| 1. | Unfold all four PVC tube sections. |
| 2. | Align all corners. |
| 3. | Ensure that the cable is pushed inside the tube. |
| 4. | Secure each corner with a slight nudge with palm of hand. All four corners must fit snuggly so as not to come apart while searching. |
| 4 Operating Procedures |
|
|
Now you are familiar with the controls and capabilities of the PULSE STAR II. In this and the following chapter you will learn how to operate the unit in actual practice.
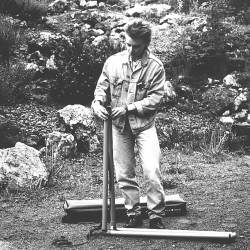
To ease transportation and storage, the one meter by one meter search coil is constructed detachable.
| With a few simple steps, your search coil is ready for use: | |||||||||
|
|
||||||||
| Fig. 7: Coil Assembly | |||||||||
| Coil disassembly: | |||||||||
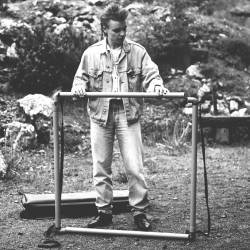
| To disassemble the one meter by one meter search coil, pull on each corner without twisting or bending each tube to prevent warping it. If you have any difficulties disconnecting any corner, then slightly hit inside the corner with your hand.Before packing and storing the search coil, make sure that the connector plug is clean, dry, and free of dirt. The plug should always be closed with the dust cap. The search coil should be cleaned and dried as well before it is stored. Please avoid sharp pulls on the connecting cable of the coil. | |
||||||||
| Fig. 8: Coil Assembly |
Start-up and Adjustment of the Tick-rate
Connect the search coil connector plug to the COIL/CHARGER outlet. Turn the sleeve on the plug clockwise until it is securely fastened. Make sure connector plug is pushed in as far as it can go before rotating the sleeve.
The leather case, which contains the PULSE STAR II electronic unit, has an adjustable shoulder strap and belt loop for easy carrying.
| In order to avoid interference of the metal parts of the electronic unit, be sure to carry the PULSE STAR II on the side of your body that is away from the coil. |
Lift the coil with a partner by the connected adjustable straps. The search coil should be held approximately six to eight inches from the ground while searching. Do not allow one end of the coil to be higher than the other.
| Make sure that no large metal objects are close to the coil for initial adjustment. Also check your shoes or boots since most of them contain metal parts and you would receive a signal response any time you step near to the coil. |
Turn on the PULSE STAR II by rotating the PWR VOLUME switch clockwise from the OFF position. Both LED lights on the meter will turn on and stay on for approximately five seconds.
It is always best to check the battery condition of the PULSE STAR II first. This is initiated by holding the MODE Switch down to the RETUNE position for at least one second. The meter needle will indicate the condition of the battery.
Next, adjust the tick-rate of the PULSE STAR II somewhere between one to five ticks per second by holding the MODE toggle switch in the RETUNE position while simultaneously turning the AUDIO TUNE knob. Do not forget to turn up the volume. If circumstances allow, the volume should be turned up high enough for both persons carrying the coil to hear it. In this way the coordination is better when trying to locate the exact position of an object.
The PULSE STAR II is now ready to use.
| Chapter 3 | Chapter 5 |